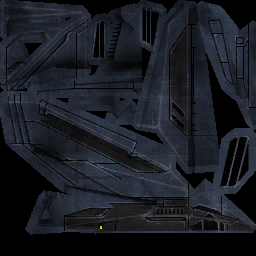
and I don't know how to properly convert these highlights/weathering effects to the specteam dds. I thought I could use the difference between the blue channel and a combination of the red and green channels to get the right team color saturation, but the results looked different from the original art style (I'm trying to get the team color in a similar stauration to the blueish gray paint on the original skins). I have made one or two ok looking skins using the brute force method, but is there a better way to convert the nearly white highlights on the albedo to black areas on the specteam? The magic wand tool doesn't seem to work very well.|||What happens when you just Grey-scale all the blue areas then just set the Team color up?
Mike|||Hmm I'm not sure I fully understand what you are trying to accomplish... Any way you could clarify a little bit, maybe with some more picture support...?|||I was trying to set the specteam up so that when the team color is set to blue it will look as close to the original skin as possible. that was where the difference filter came in, but that didn't have the effect I wanted; I'd get gray splotches wherever the skin had shadows and the highlights would have more color than they did on the albedo
If I simply gray out the albedo and make the specteam only one solid shade, the highlights will look different than the original.|||I think I understand what you are trying to accomplish. And to really give you a good answer, I'd have to muck around in Photoshop trying a few things. But I don't have time for that. But one of the things you mention is that you would like the team color to NOT be applied to the worn white areas or maybe the crevices and scratches.
The key to something like that is to learn to work with channels. What you can do is to view the color albedo file in the channels palette where each color has a grayscale representation of its values. If you hold down Ctrl and click on the icon for any channel (or layer too for that matter) you have just made a selection based on that channel. So if you do that to the color channel showing the most contrast, you have a nice selection representing the values. You can then use this selection to create a mask for a layer or any number of things. The point is you are using the values of a given channel to make an accurate selection without having to resort to the magic wand. This is an easy way to mask out the areas you don't want the Team color applied to.
No comments:
Post a Comment